Apple Honeycomb Cake
Bánh Bò Nướng
The Vietnamese baked honeycomb cake dressed for autumn: a chewy, custardy crumb full of long tunnels, crisp caramelized edges, apple and cinnamon, and a white chocolate glaze.
 Adept
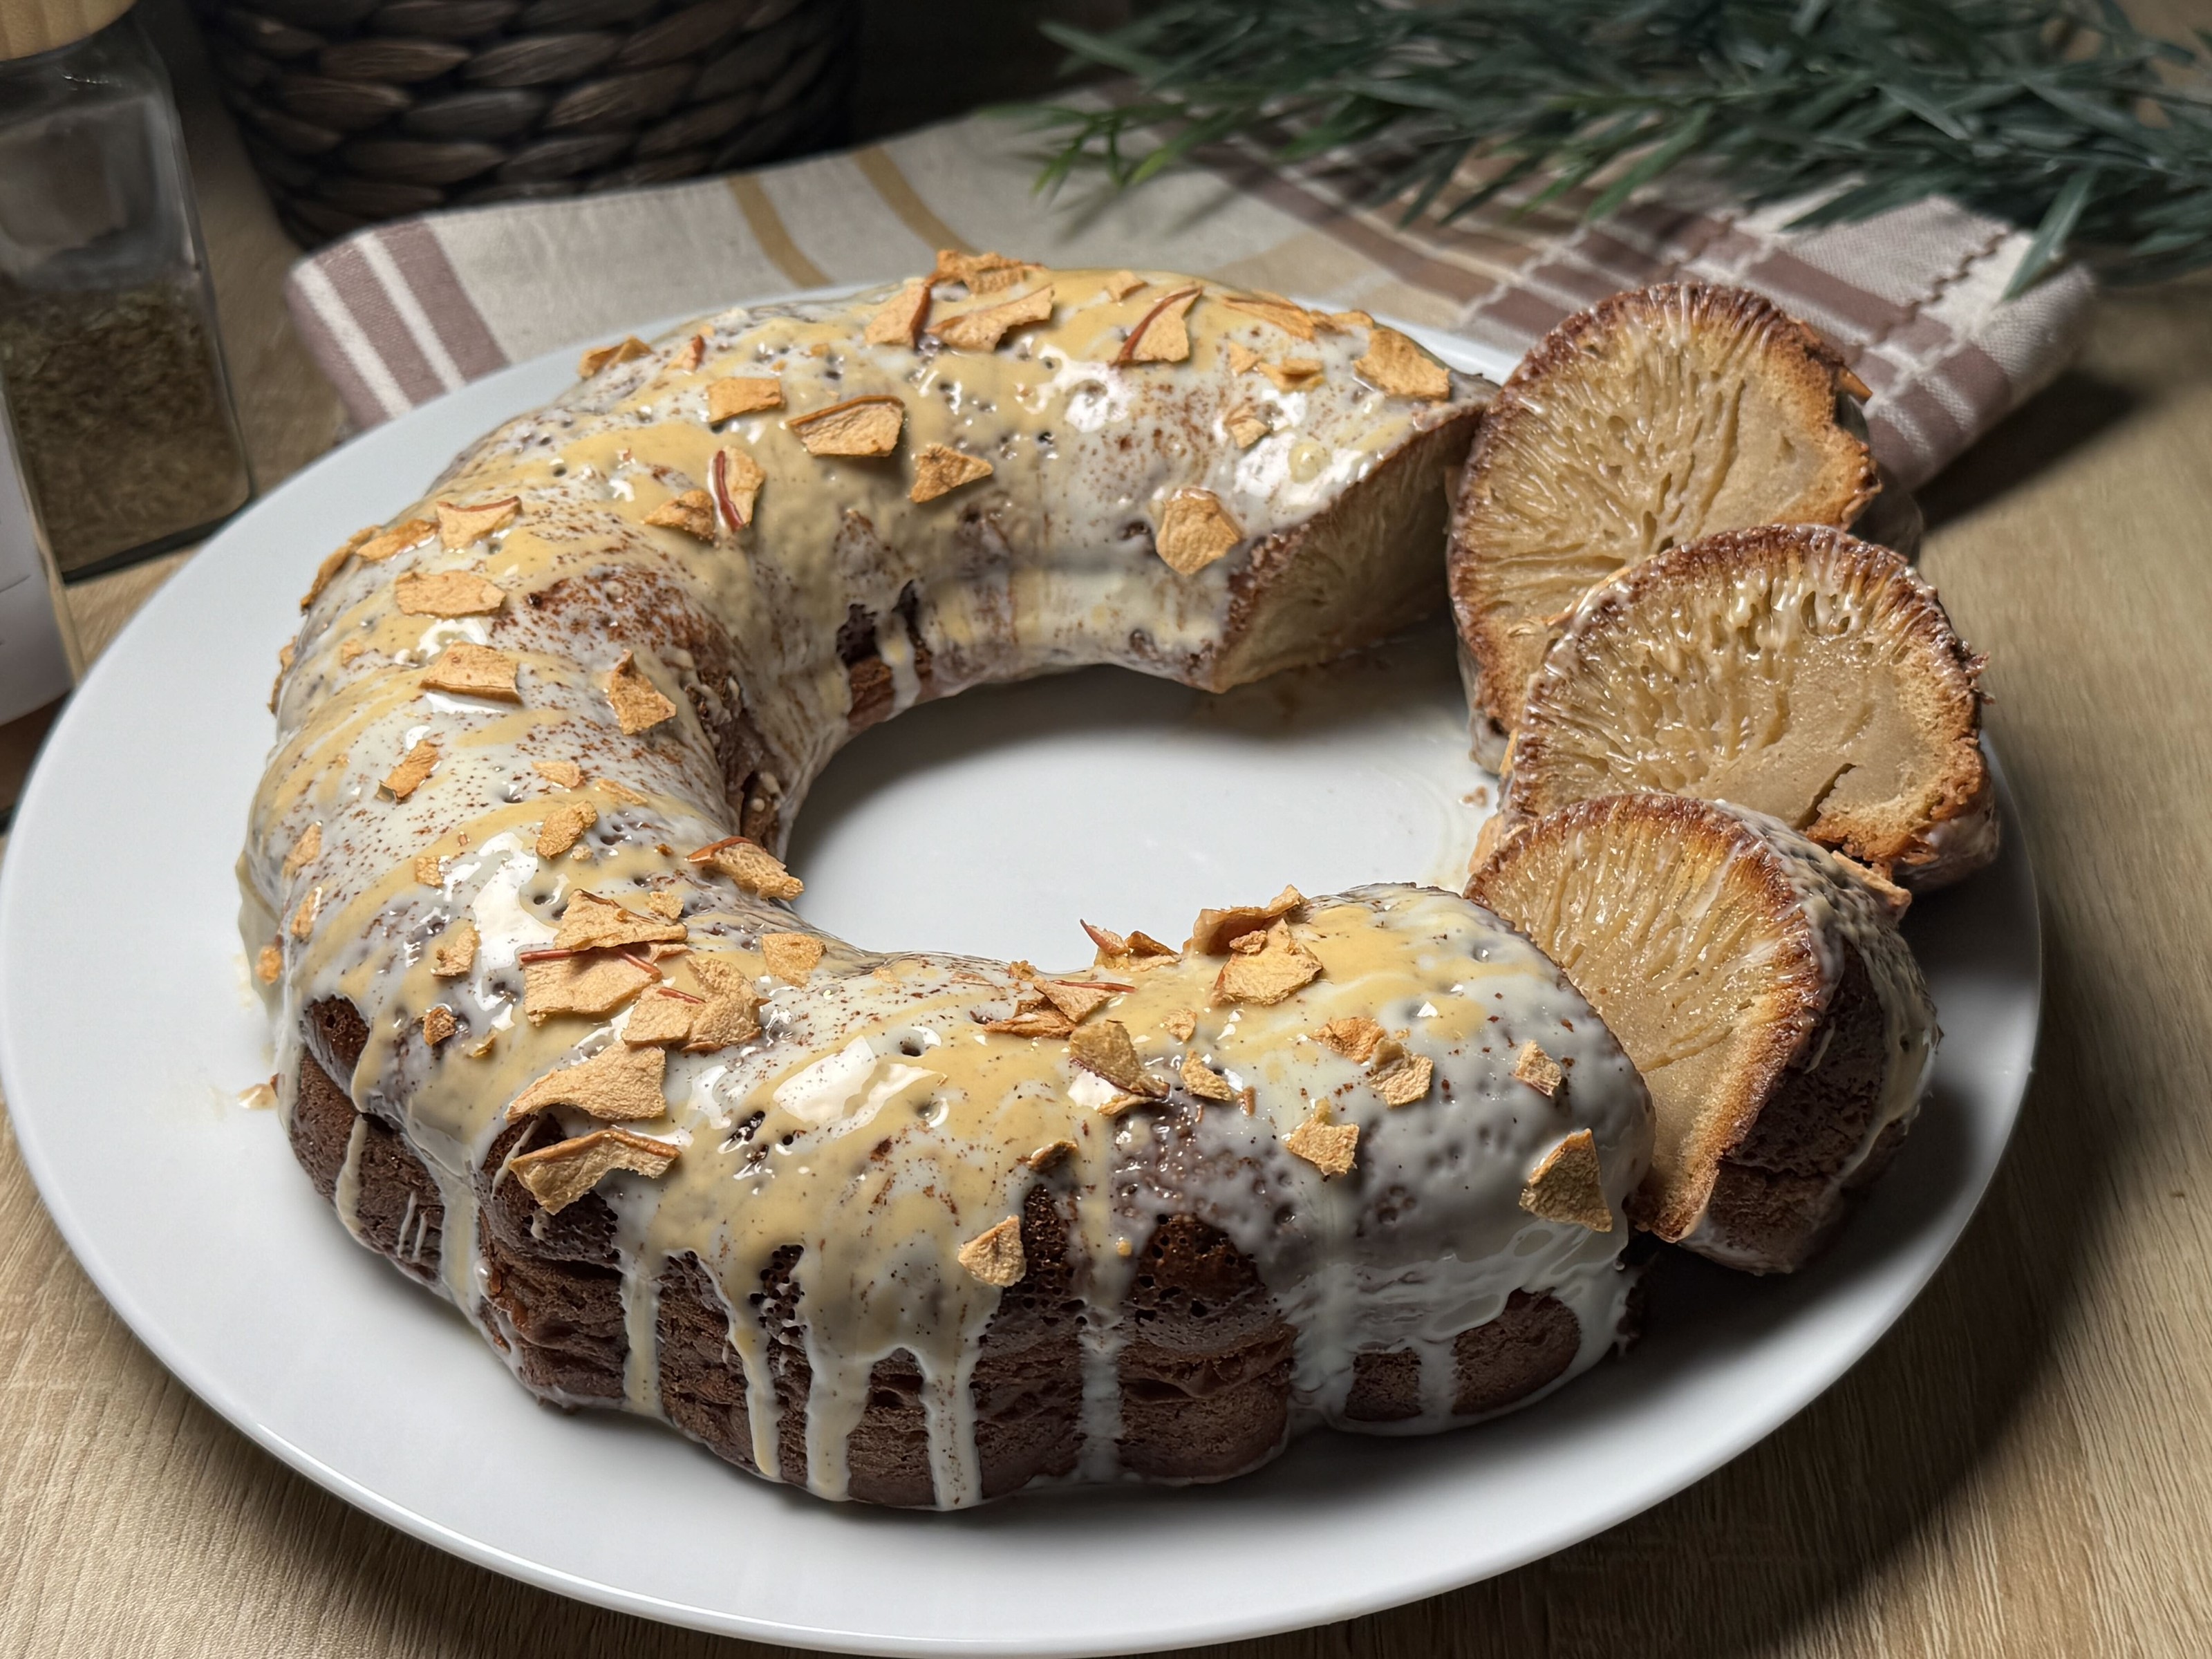
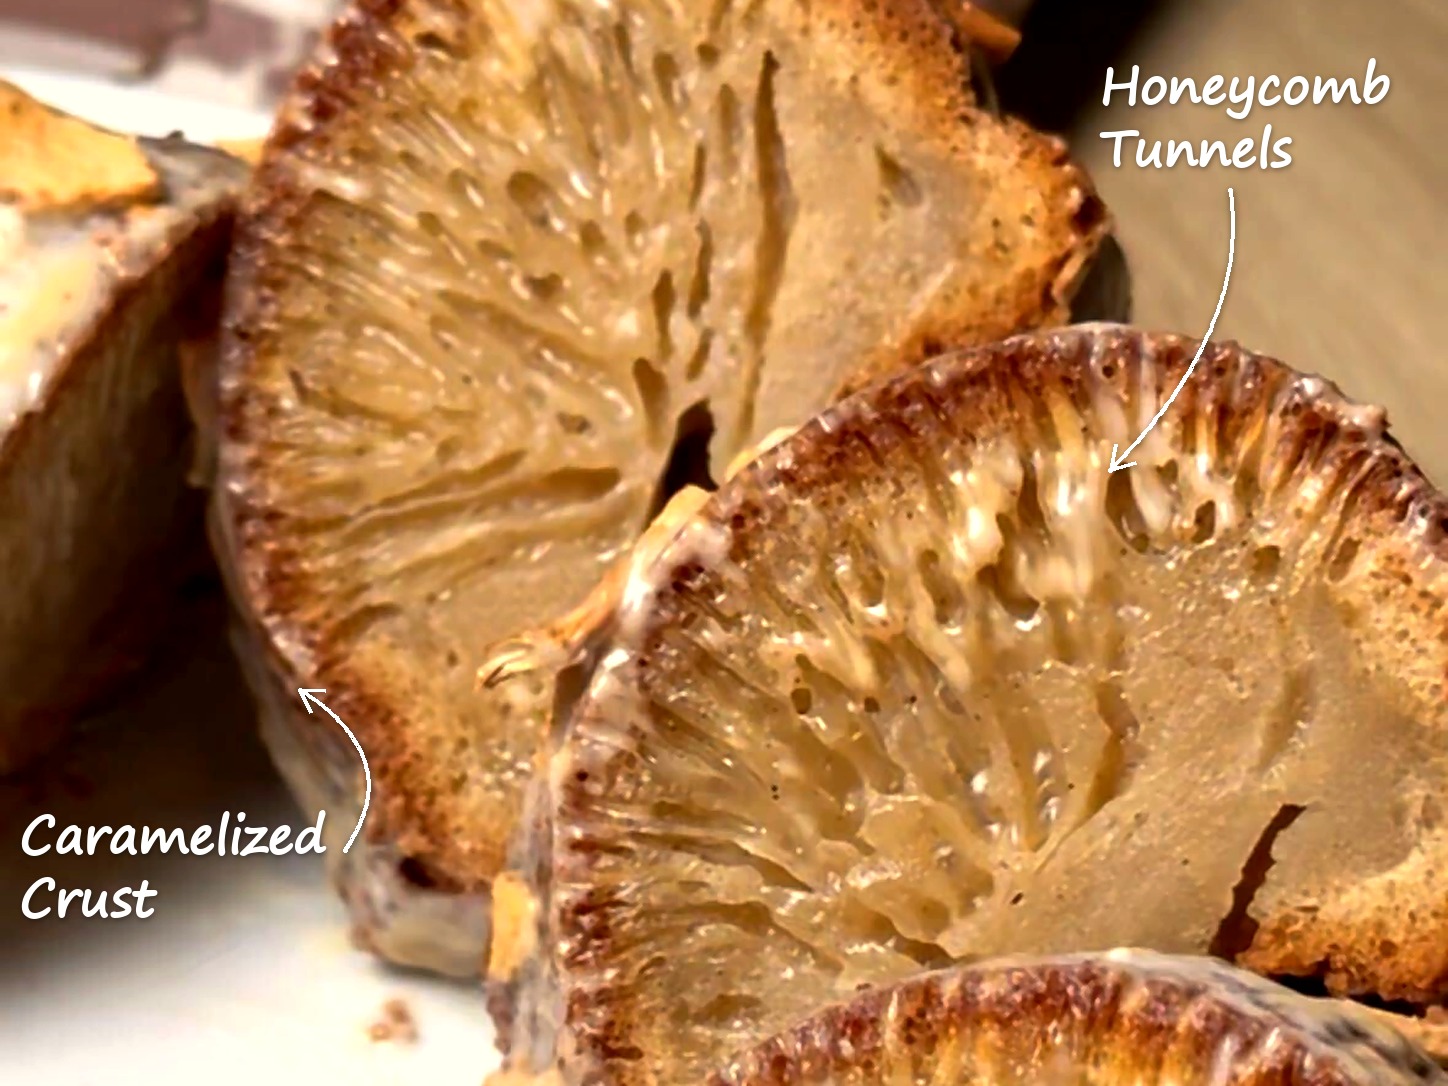
Some desserts are all about the inside, and this is one of them. Bánh bò nướng, the Vietnamese baked honeycomb cake, looks like a simple golden ring from the outside, but slice into it and you'll find long tunnels running from the bottom to the top, a chewy, almost custardy crumb, and crisp caramelized edges. It's traditionally flavored with pandan or coconut, but this time I dressed it for autumn with apple, cinnamon, and a splash of boiled cider.
The batter is made without any wheat flour: just tapioca starch, a little rice flour, eggs, and coconut milk. The magic happens in the oven, where a preheated pan and a slow, steady bake push bubbles up through the batter and set them in place. Finished with a white chocolate glaze and a dusting of cinnamon, it's the cake I want on the table with a mug of tea on a chilly evening.
A Vietnamese classic, wrapped up in an autumn sweater! Follow the tips and inspirations below.
Make It Yours
Swap the Flavor:
Use the same 140g of pumpkin purée or peach purée instead of apple. Everything else stays the same, it’s just a matter of taste.
Change the Glaze:
Whisk 120g powdered sugar with 20 to 25g milk until thick but pourable, and it will set in about 30 minutes. Or drizzle the cake with 80 to 100g of caramel sauce instead.
Add Toppings Right After Glazing:
Dried apple chips (like in my photo), chopped toasted nuts, sprinkles, or whatever your heart desires.
Good To Know
Heat the Pan with the Oven:
Hot batter meeting a hot pan is what starts the honeycomb; a cold pan gives a dense cake.
Keep the Syrup Warm, Not Hot:
Too hot and it cooks the eggs; too cold and the cake rises less.
Don’t Skip the Sieve or Open the Oven During the First Hour:
Lumps and a sudden drop in heat both ruin the tunnels.
Let It Cool Completely Before Slicing:
Warm, the inside is gummy; it firms up into that chewy texture as it cools.
Instructions
Four stages: cook the apple coconut syrup, mix and sieve the batter, bake in a preheated pan, then glaze and serve. The pan goes into the oven in the very first step, so read through everything before you start.
Stage 1: Make the Apple Coconut Syrup
- Preheat the oven to 350°F (175°C) and place the empty bundt pan inside so it heats up with the oven.
- In a saucepan over medium heat, add 140g apple purée, 10g cinnamon, and 40g boiled cider, if using. Cook, stirring, for 12 to 15 minutes, until thick, glossy, and pulling away from the bottom.
- Add 270g sugar, 400g coconut milk, 10g vanilla, and 3g salt to the same pan. Whisk over medium heat for about 1 minute, just until the sugar dissolves. Do not let it boil. Set aside until just warm.
Stage 2: Mix the Batter
- Sift 260g tapioca starch, 30g rice flour, and 10g baking powder into a large bowl and whisk together.
- Set a sieve over a second bowl and gently press 250g eggs through it with a spatula. Discard anything left in the sieve.
- Pour the warm apple and coconut mixture through the sieve into the eggs and whisk gently, just to combine.
- Pour the apple and egg mixture through the sieve into the dry ingredients and whisk gently until you have a thin, lumpy batter.
- Press the batter through the sieve into a clean bowl, then once more, until completely smooth. Stir in 30g melted coconut oil.
Stage 3: Bake
- Carefully take out the hot pan, brush it with 5g coconut oil, and pour in the batter right away.
- Bake for 1 hour 15 minutes to 1 hour 30 minutes, until the top is deep golden and springy and a toothpick comes out clean.
- Cool in the pan for 10 minutes, then turn out onto a plate and let it cool completely, about 2 hours.
Stage 4: Glaze & Serve
- Melt 120g white chocolate with 10g coconut oil in 15-second bursts, stirring between each, until smooth.
- Pour the glaze slowly over the cooled cake, letting it drip down the sides, and dust with a pinch of cinnamon.
- Let the glaze set for 10 to 15 minutes, then slice and serve. Enjoy!
Ingredients
For the Apple Base
- 140g thick unsweetened apple purée or applesauce
- 10g ground cinnamon
- 40g boiled apple cider, optional, for deeper apple flavor
For the Coconut Syrup
- 270g granulated sugar
- 400g full-fat coconut milk (1 can)
- 10g vanilla extract
- 3g fine salt
For the Batter
- 260g tapioca starch
- 30g white rice flour (not sweet rice flour)
- 10g baking powder
- 250g eggs (about 5 large, without shells)
- 30g coconut oil, melted
- 5g coconut oil, for the pan
For the White Chocolate Glaze
- 120g white chocolate, chopped
- 10g coconut oil
- A pinch of ground cinnamon, for dusting
Nutritional Value
Values are approximate and calculated per slice, based on 12 slices, including the optional boiled cider and the glaze.
Calories: ~375 kcal
Total Fat: 16g
Carbohydrates: 55g
Protein: 4g
Note: Nutritional values are approximate and may vary based on specific ingredients and portion sizes.